Add Algolia Search to Your Gatsby Site
4 min read

n this post, we will be looking into how to add algolia search to your gatsby site. we will see how to configure Algolia in gatsby and add Algolia's built-in component..
To setup algolia search, first, you need to:
create an account at algolia's website
once done, you create an index you can name whatever you want (blog for example)
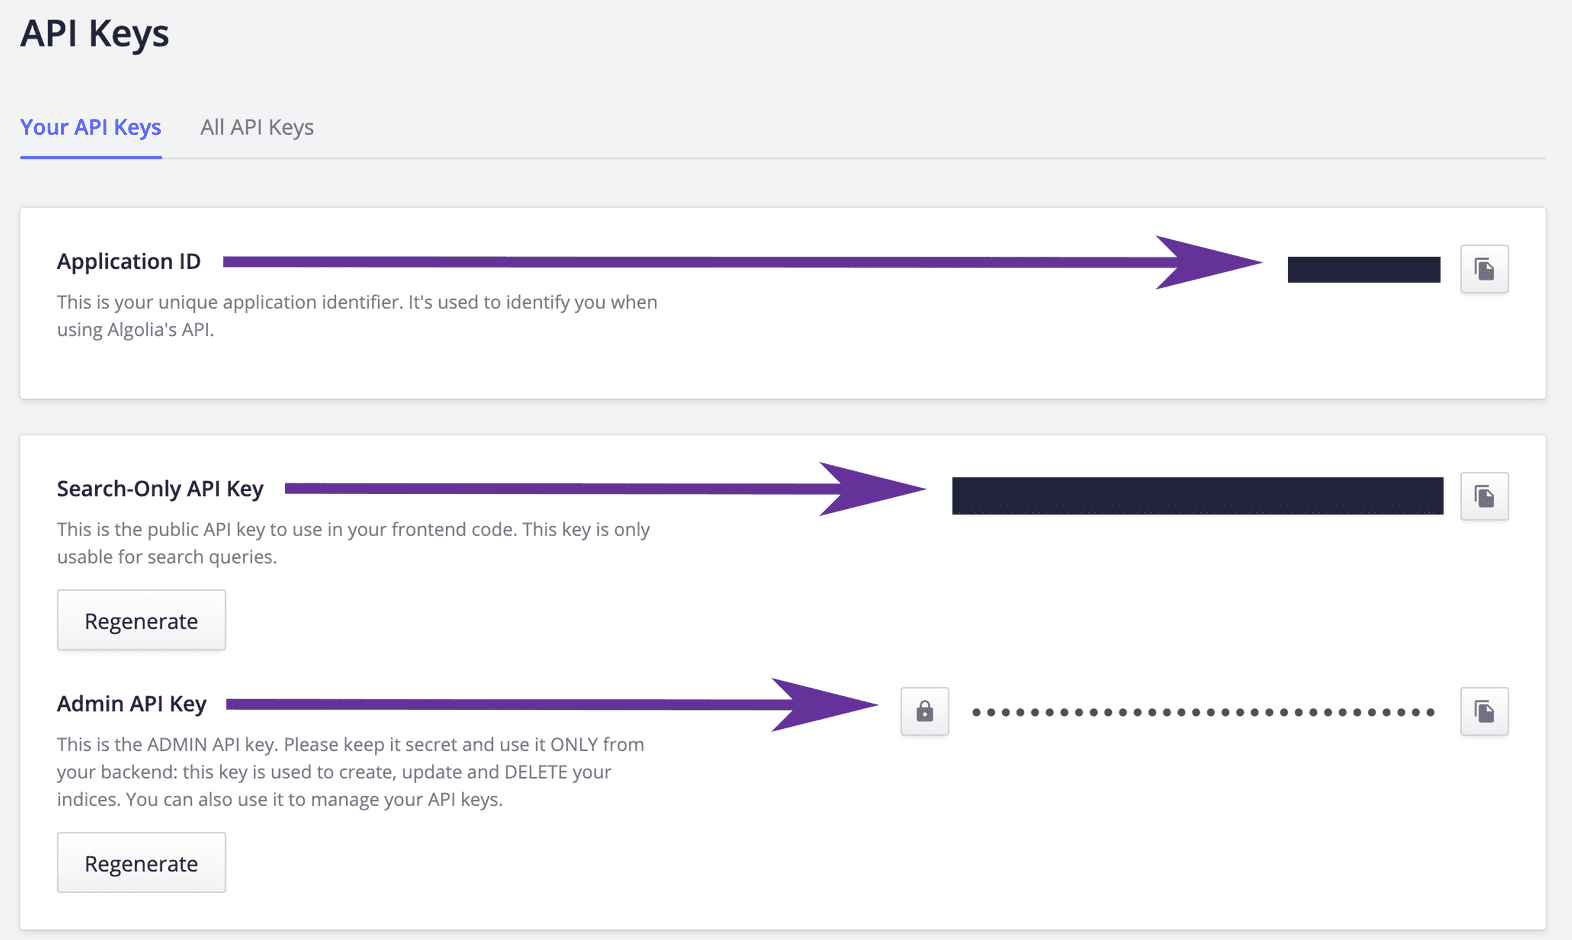
After that, we can grab the API keys and put them in your .env which you can find them here
GATSBY_ALGOLIA_APP_ID="xxxx"
2GATSBY_ALGOLIA_INDEX_NAME="test"
3ALGOLIA_API_KEY="xxx"
4GATSBY_ALGOLIA_SEARCH_KEY="xxx"
Configuration
Now moving back to code, by installing a couple of plugins that we are going to use
npm install algoliasearch dotenv gatsby-plugin-algolia react-instantsearch-dom
After installing the gatsby plugin it will allow us to fetch the data with GraphQl and send it to algolia.
Now that we install the plugins, we can start adding the configuration in gatsby-config to fetch the data from the build and insert it into the index in algolia.
To do so, we create the query as follow
1const blogQuery = `2{3posts: allMdx(4filter: { fileAbsolutePath: { regex: "/posts/" } }5) {6edges {7node {8objectID: id9frontmatter {10title11date12path13}14excerpt(pruneLength: 5000)15}16}17}18}19`;
and then add the transformer method which is just mapping the data
1const settings = { attributesToSnippet: [`excerpt:20`] };2const queries = [3{4query: blogQuery,5transformer: ({ data }) =>6data.posts.edges.map(({ node: { frontmatter, ...rest } }) => {7return {8...frontmatter,9...rest,10};11}),12indexName: process.env.GATSBY_ALGOLIA_INDEX_NAME,13settings,14},15];
Basically what the above snippet does is the queries object grab the GraphQL json data and turning them each into own separate object that we want algolia to index from Gatsby GraphQl layer which is going to contains GraphQl query, optional index name, transformer function and settings object.
The next step will be configuring gatsby-plugin-algolia as follow
1require("dotenv").config();2// we can pass an object with a property of path to config method which would look3// like this for example {path: '.env.production'} in case if you want to configure for different modes45module.exports = {6plugins: [7{8resolve: `gatsby-plugin-algolia`,9options: {10appId: process.env.GATSBY_ALGOLIA_APP_ID,11apiKey: process.env.ALGOLIA_API_KEY,12indexName: process.env.GATSBY_ALGOLIA_INDEX_NAME, // for all queries13queries,14chunkSize: 10000, // default: 100015},16},17],18};
the plugin takes an options object with the keys we added earlier in the env file and the queries object which contains your query (you can pass more than one query to that, for example, a query for posts and a different one for pages) and the transformer method for mapping, index name and any settings you wish to pass.
Once the configuration is done, you can run your project in production mode to send the data to algolia so that you can test by running gatsby build and it will look like the following

Now we can move to the frontend part after configuration and indexing part finished.
Frontend
In this section, we will be looking into how to install algolia search to your gatsby site.
Algolia Search component
To do that, first, we create a new component call it Search.js which would utilise algolia's instant-search component (you can check the docs for more info)
Search.js
1import algoliasearch from "algoliasearch/lite";2import { InstantSearch, SearchBox, Hits } from "react-instantsearch-dom";3import React from "react";45const appId = process.env.GATSBY_ALGOLIA_APP_ID;6const searchKey = process.env.GATSBY_ALGOLIA_SEARCH_KEY;7const searchClient = algoliasearch(appId, searchKey);89const Search = () => (10<InstantSearch11searchClient={searchClient}12indexName={process.env.GATSBY_ALGOLIA_INDEX_NAME}13>14<SearchBox />15<Hits />16</InstantSearch>17);1819export default Search;
As you can see in the above snippet, we first added InstantSearch component which as defined by algolia in the docs as a component that interact with Algolia’s API, to easily build instant-search applications. InstantSearch takes two properties, searchClient that contains your app id and search key which was defined in env earlier and indexName that you defined in algolia's account. The component has two children components, SearchBox component as the name implies and input field with search and delete icon and a Hits component (Hits are the return result from your query). The result of the search component will look something like this
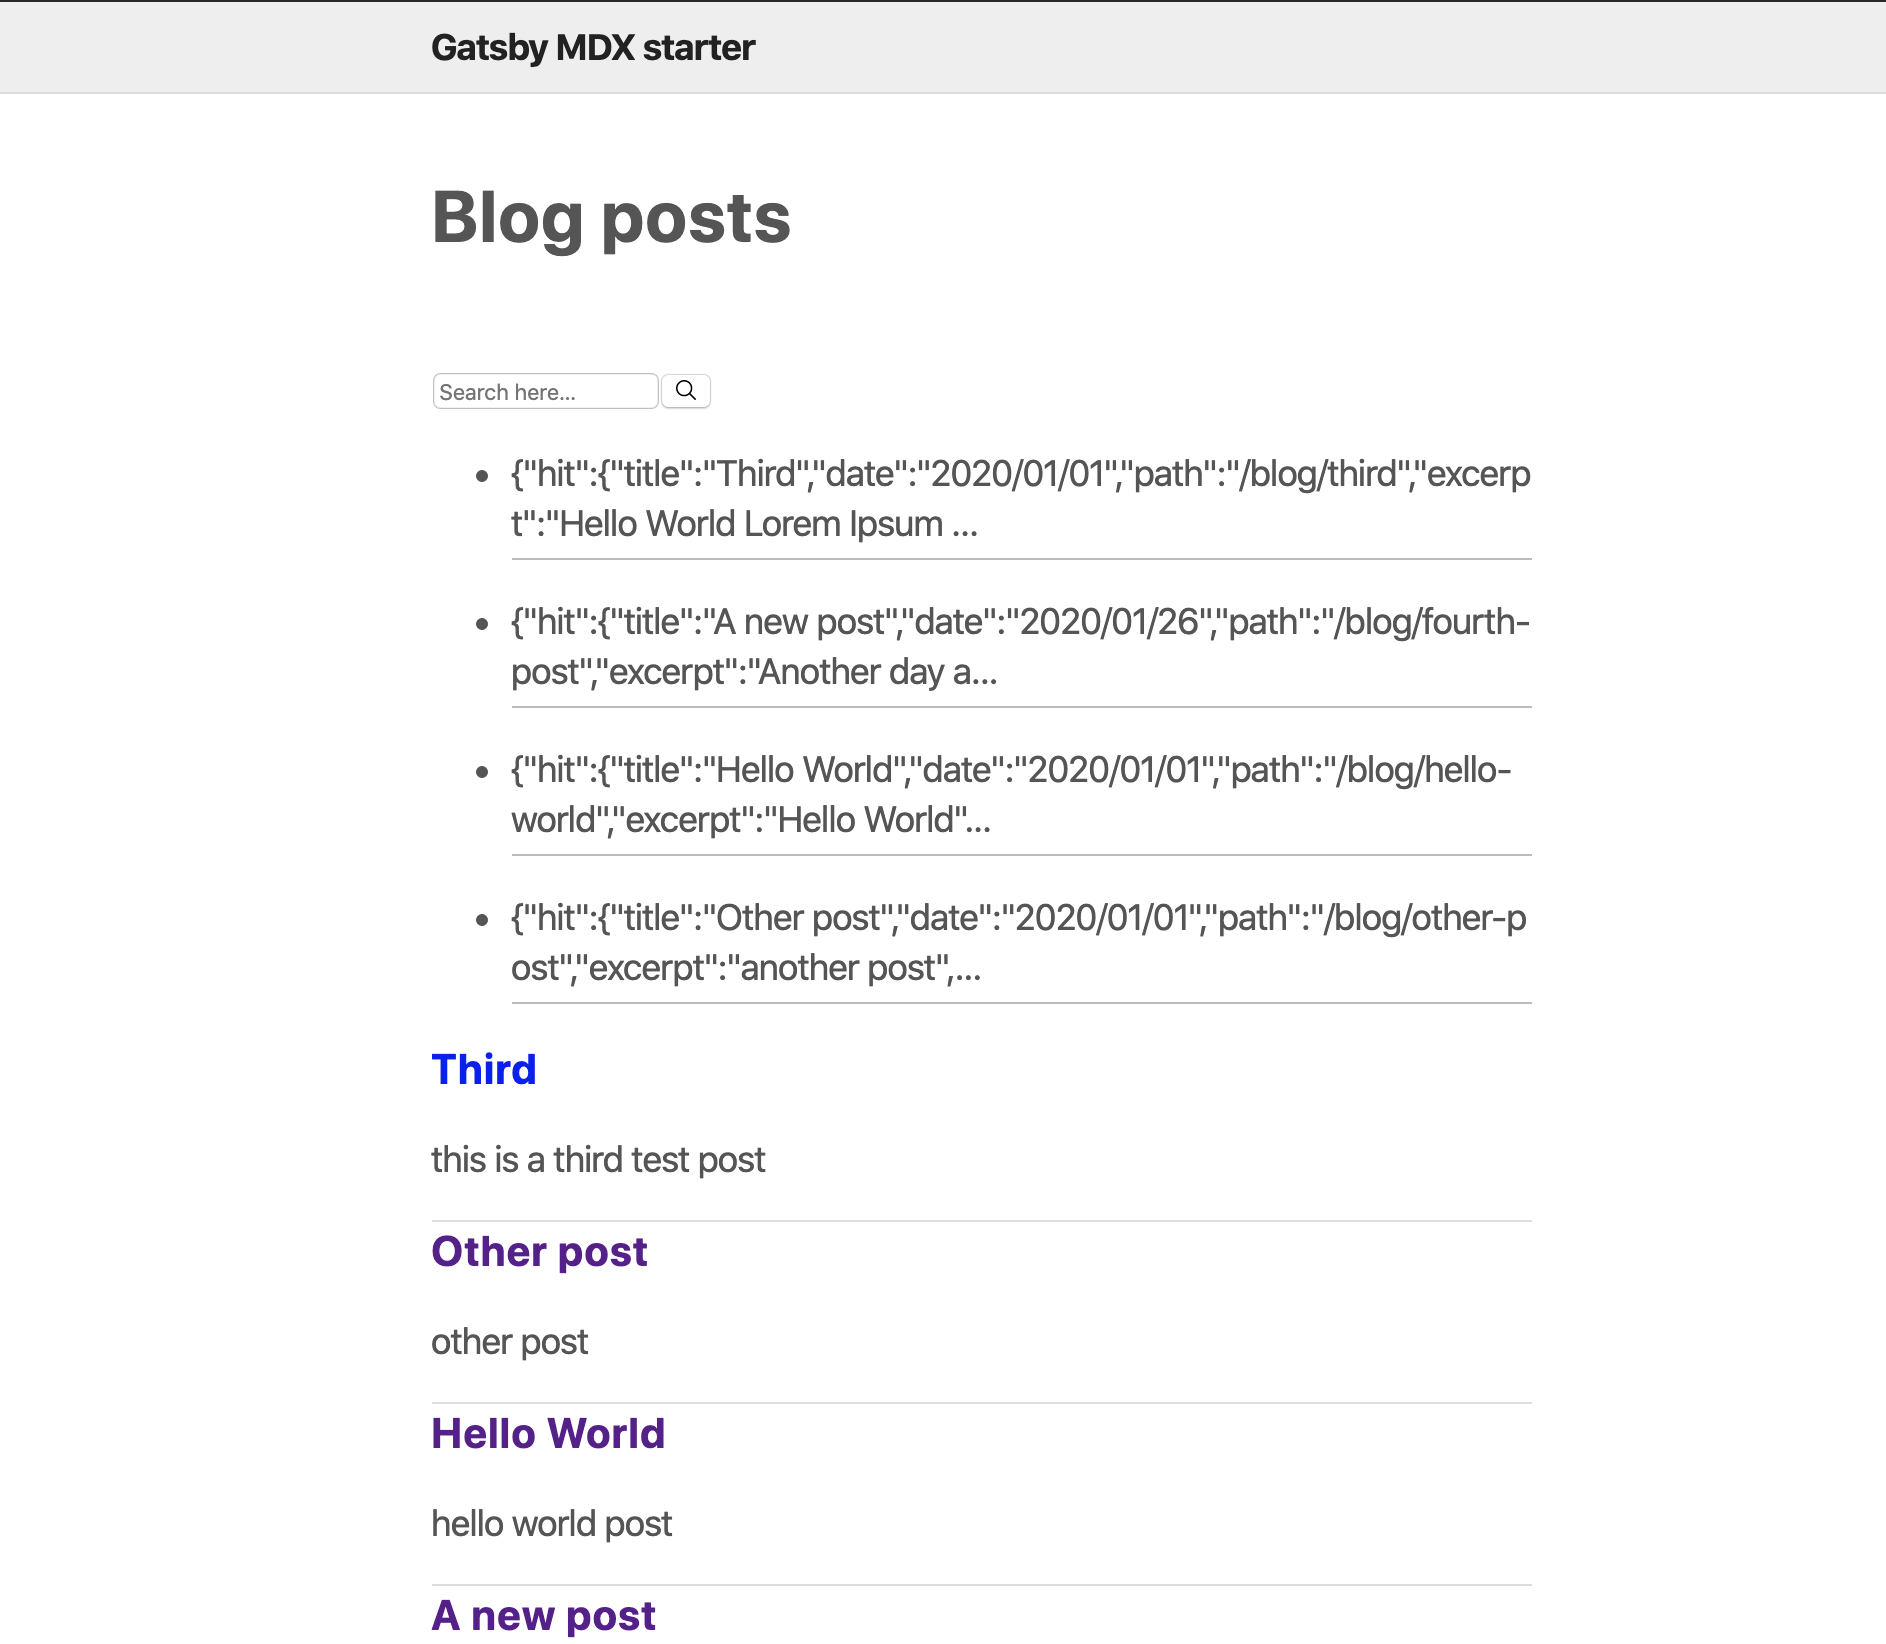
We can replace the HTML you see in the screenshot from the list of posts with the actual hits which is a good spot to do highlighting for the searched keywords etc. To do so, we can add an attribute hitComponent which going to pass the data that it receives from Hits to the component you pass to it for example postPreview.
import PostPreview from "./PostPreview";
<Hits hitComponent={PostPreview} />;
And our PostPreview can look something like the following where we add a link to the post and show the excerpt about the post.
PostPreview.js
1import React from "react";2import { Link } from "gatsby";3import { Highlight } from "react-instantsearch-dom";4import { css } from "@emotion/core";5const PostPreview = ({ hit }) => {6return (7<article>8<h3>9<Link to={hit.path}>10<Highlight hit={hit} attribute="title" tagName="mark" />11</Link>12</h3>13<small>{new Date(hit.date).toLocaleDateString()}</small>14<p>15<Highlight hit={hit} attribute="excerpt" tagName="mark" />16</p>17</article>18);19};2021export default PostPreview;
once that done, we can add another widget that does the highlighting. By default, the prop attribute that was to Highlight component is going to be enabled on all the searchable attributes, but you can limit it to a specific one that you want to make it searchable.
The Highlight widget is going to look for the attribute to highlight, which is going to create a span around the searched term in the content and highlight that span.
An example of adding the Highlight widget
<Highlight hit={hit} attribute="title" tagName="mark" />
By adding the above, it is going to highlight the attribute title if it matches the search query as you can see below
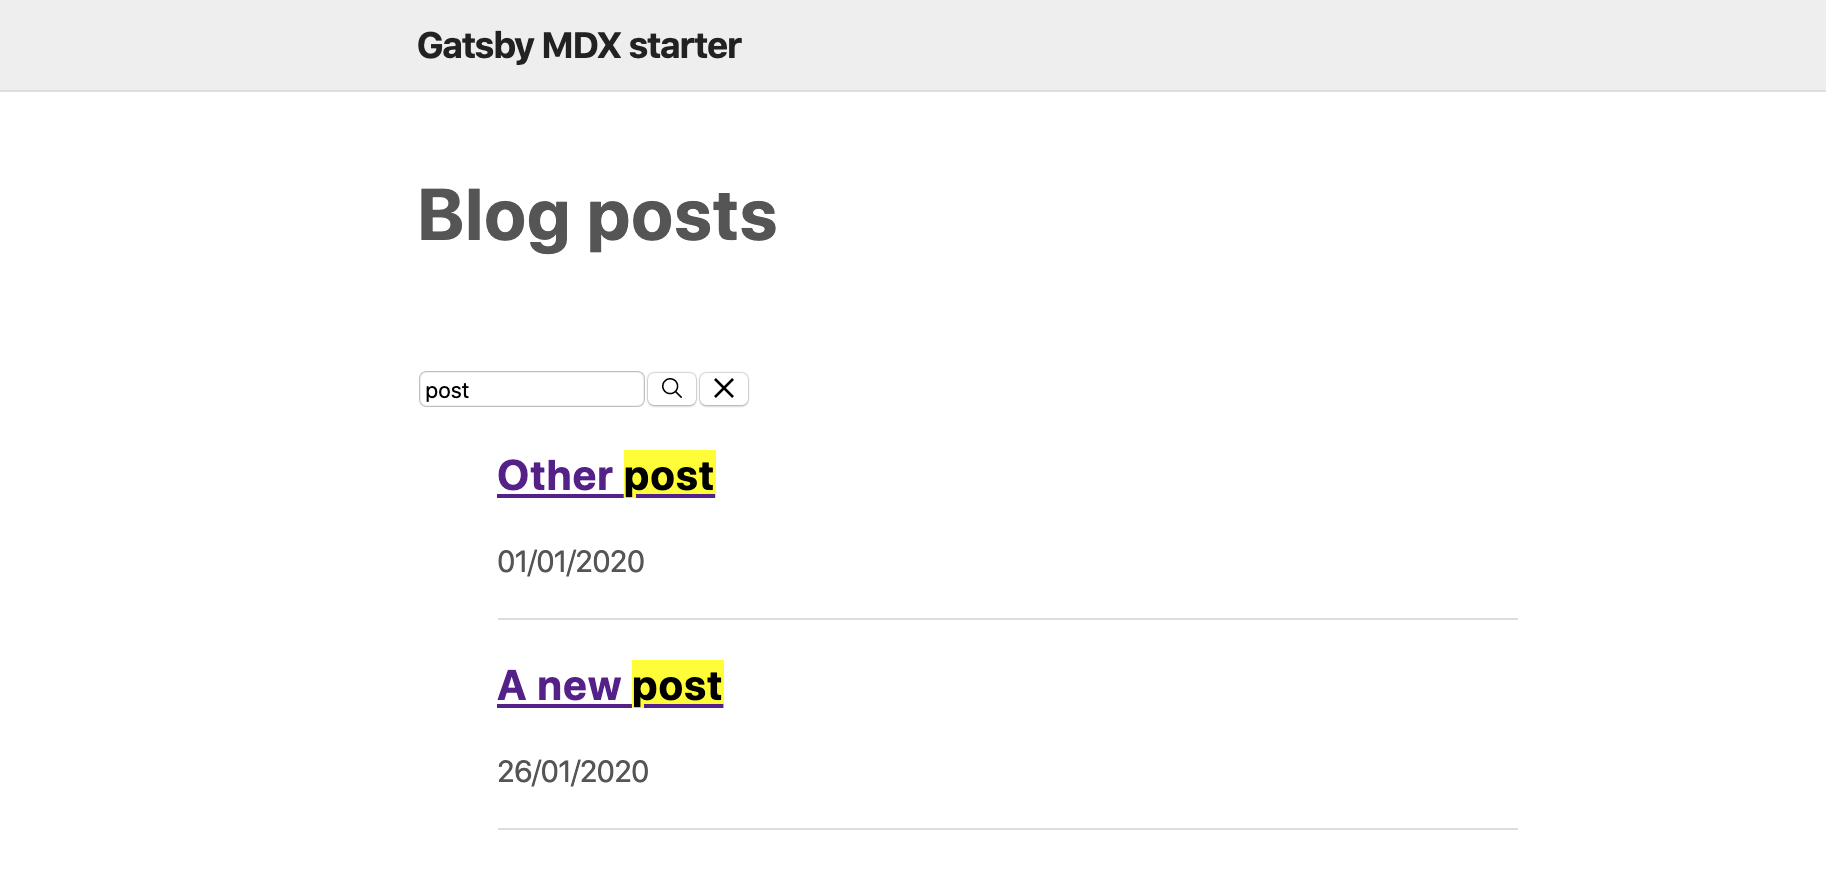
As a result, now we have Search component that uses algolia InstantSearch as a base component.
Following the post and you can find a starter repo here that shows usage of Algolia Search component
I hope part one showed how you can install and add algolia search component to your Gatsby site. Part two will cover how to create a custom search component with Algolia.